Cookie
Electronic Team, Inc. uses cookies to personalize your experience on our website. By continuing to use this site, you agree to our cookie policy. Click here to learn more.

Complete Serial Port Testing Guide

Olga Weis Olga Weis

There are many instances where the ability to troubleshoot problems in serial interfaces and devices can be important. Many industrial and commercial devices such as automation controllers, medical monitoring equipment, and scientific instruments make use of serial ports for communication. It can be quite challenging to identify the underlying issues, and we describe some common ones in our RS232 troubleshooting guide.

The most important item required for this type of problem resolution is a quality tool that can provide the information required to address the issue. Here’s where an excellent app like Serial Port Tester can save you time and trouble when tracking down serial communication problems.

This article discusses the features of this software solution and walks you through this very effective way of how to check serial port communication.

RS232 testing software

Serial Port Tester is a serial communication tool that can display and capture all data traveling through a system’s COM ports. Developers and testers of serial apps and devices are able to analyze all port activity from the software’s logs, negating the need for manual documentation.

Serial Port Monitor
14-day free trial

This application offers a host of features that set it ahead of the competition. An intuitive and user-friendly interface enables the user to take advantage of all of the software’s features. These include the ability to view data in four different modes, a built-in terminal for sending data, and advanced search and filtering capabilities.

Serial Port Tester supports the RS232, RS422, RS485, Modbus and many other serial communication protocols. You can also export data to a file or copy it to the clipboard from within the application.

Supporting Modbus RTU and ASCII

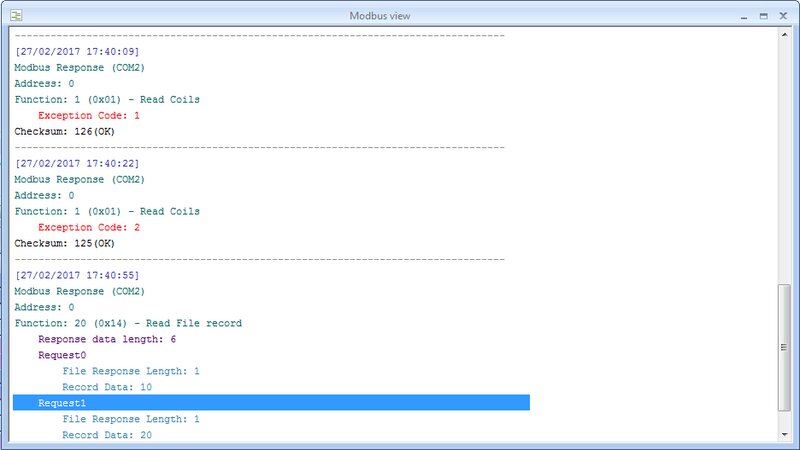
Modbus protocol is very broadly implemented, mainly the serial versions of it (RTU and ASCII ones). The most common way of using Modbus is Modbus RTU. Are you developing software that communicates with electronic devices through Modbus RTU? In this case, you will surely appreciate a high-quality Modbus RTU software for monitoring and analysis of data sent via this protocol.

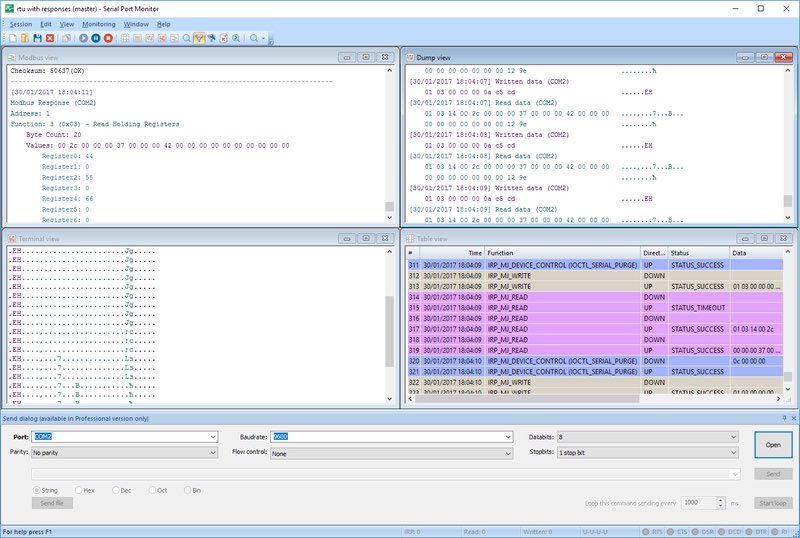
Serial Port Tester has an advanced option to monitor and analyze Modbus RTU and Modbus ASCII data packages. With this tool, you will have the ability to visualize Modbus data in a convenient way.

Modbus view

Why choose this serial testing software?

  • Ease of use. The application was designed with the user in mind and provides an intuitive and user-friendly GUI. This facilitates the process of COM port testing, making this an effective tool for monitoring your system.

  • Reliability. Stability is important in a software utility and Serial Port Tester offers that with its support for all versions of the Windows operating system. This includes the newest version of Windows 10 in both the x32 and x64 flavors. The internal drivers of the tool are digitally signed for your protection.

  • Versatility. COM Port Tester can be a useful tool in a wide variety of situations. You can use it to monitor a single port or multiple interfaces simultaneously. Each monitored port’s data can be read, recorded, displayed, and saved for later analysis. The terminal allows you to emulate data transmission to a specified port using string, octal, decimal, binary, hexadecimal, or mixed formats.

How to test COM ports: step-by-step instructions

For this demonstration, we will use Electronic Team’s Serial Port Tester as our COM port testing application. We will walk through a few typical use cases for the software.

First case: monitoring serial port activity

Use this procedure to monitor your system's serial port activity.
1
Download and install the program. Launch it and proceed to the next step to start a new monitoring session.
2
From the main menu choose "Session > New session", use the 'Ctrl + N' keyboard shortcut or click "New" on the toolbar.
 New session
3
The "New monitoring session" window will be displayed.

Table of views
You can now select the viewing mode which will be used to display the monitored serial data. The four choices are:

• Line: displays IRP details in lines of plain text;

• Dump: two-way serial data displayed in hexadecimal and string formats;

• Terminal: presents the data as ASCII characters;

• Table: recorded IRPs are displayed in a table.

"Select all" or "Select none" are other viewing options
4
Select "Start monitoring now" to start monitoring right away and enable the "New window" option if that is where you want to conduct this session.
5
Choose the events you want to monitor in the "Capture options" menu. You can select create/close, read/write, or device control.
6
Click "Start monitoring" to begin the monitoring session.

If you want to save the session, select "Session -> Save session/Save session As" from the app's main menu.
 Save session

Second case: Resending data to a COM port

Reproducing the data flow between a serial interface and a serial application or device can be instrumental in testing and resolving problems. Using Serial Port Tester, you can repeatedly send identical serial data streams to observe the behavior of an app or device.

Follow these steps to send data to a serial port:
1
Open a current monitoring session or start a new one.
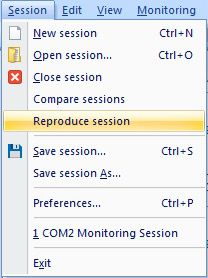
 Reproduce session
2
“Select Session > Reproduce” and configure the parameters that will be used in the transmission.

Use port - This parameter designates the COM port that will receive the reproduced data stream.

Send requests to this port - This option is enabled when you are sending data to a serial interface as if it is coming from a serial application.

Respond as a device - Use this option when you are sending data to a COM port on behalf of a serial device.

Preserve time intervals - Data packets will be sent with predetermined time intervals when this option is set.

Custom IO timeout - Define the Read/Write timeout parameters you will use for the session.
3
Click ”Start”

Third case: Compare monitoring sessions

Comparing two saved monitoring sessions can provide valuable information regarding your serial communication.

After you have saved the monitoring session using serial port test software you can compare it with another session to see the differences.

To achieve this, just do the following:
1
Start or open a monitoring session.
2
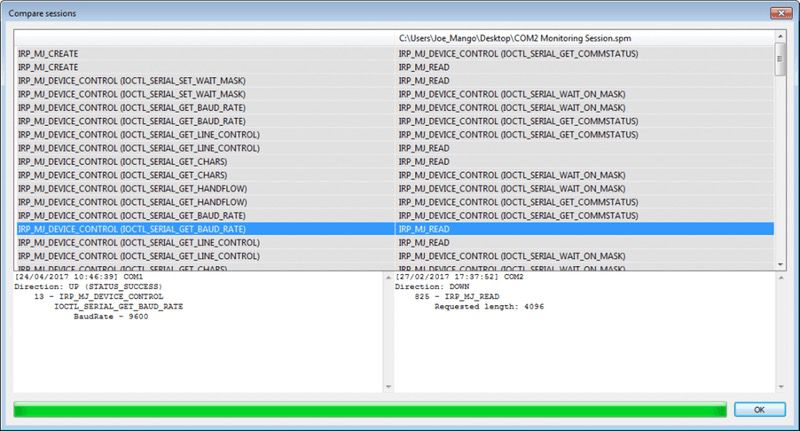
On the main menu, choose “Session > Compare Sessions”.
 Compare session
3
Choose the monitoring file that will be used for the comparison.
4
The sessions will be displayed side-by-side, making it easier for you to analyze the differences in the sessions.
 Table of analyze

Ways of implemented a loopback test

What is loopback testing

A loopback test involves sending and receiving data from the same COM port. A signal is initiated from a device and returned to it after traversing part or all of a network.

What information does the loopback test provide?

The loopback test is providing information about:

  • problems in a network of serial devices;

  • ways to determine if a device is operating properly.

It’s an important method for troubleshooting serial communication problems and make sure that the COM port works correctly.

It often employed to address issues with RS232, RS422, and RS485 communications. You can emulate a communication circuit with a loopback test and eliminate the need for extra equipment to track down problems. Some modification of the port’s pins needs to be done in order to allow two-way communication on the same interface.

How to do a loopback test

A simple loopback test of an RS-232 interface requires connecting the transmit (TXD) pin to the receive (RXD) pin. The differential pairs of the RS-422 and RS-485 protocols demand the connection of the TXD+ pin to the RXD+ and the TXD- to the RXD-.

Hardware flow control can be incorporated into more advanced loopback tests by making additional pin connections. Similarly to the transmit and receive pins, in an RS-232 port you connect the CTS and RTS pins to the DTR and DSR pins. For RS-422 and RS-485 interfaces, you connect the CTS+ with the RTS+ and CTS- with RTS-.

Below you can see the pinout diagram of a common serial connector, DE-9:
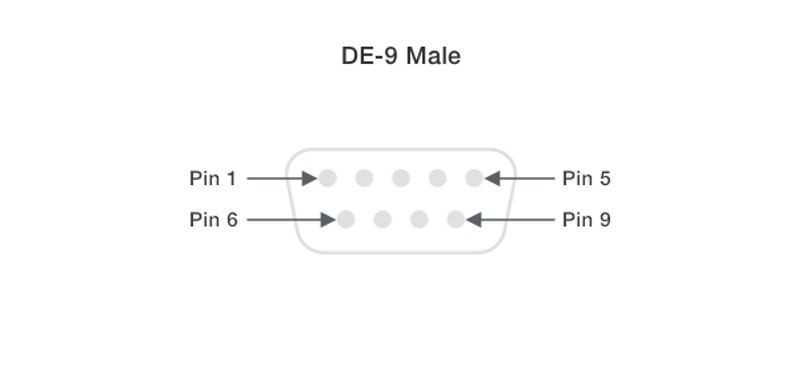
DE-9 Male Pinout table

For a simple loopback test (marked red in Fig. 2,3 below), you connect:

  • pins 2 and 3 for RS-232;
  • pins 4 to 8 and 5 to 9 for RS-422/485. Loopback test

For a loopback test with a hardware flow control (marked blue in Fig. 2,3), you connect:

  • pins 4 to 6 (DTR/DSR hardware flow control) and 7 to 8 (RTS/CTS hardware flow control) for RS-232;
  • pins 2 to 3 and 6 to 7 for RS-422/485. Both connections are required to address the differential connections.

Pin numbers are often engraved on the connector casing. This is how pins are identified in the DE9 connector of the RS-232 serial port:

Pin numbers

Loopback Test in HyperTerminal

HyperTerminal permits your computer to act as a terminal to remotely connect with other systems. It employs telnet or a standard RS-232 serial bus to connect with remote devices.

Since HyperTerminal makes use of serial ports for data transfer, it can be used for loopback testing.

This is how it’s done:
1
Create a new connection in HyperTerminal and name it. Select the icon for your connection.
 Establish a new connection
2
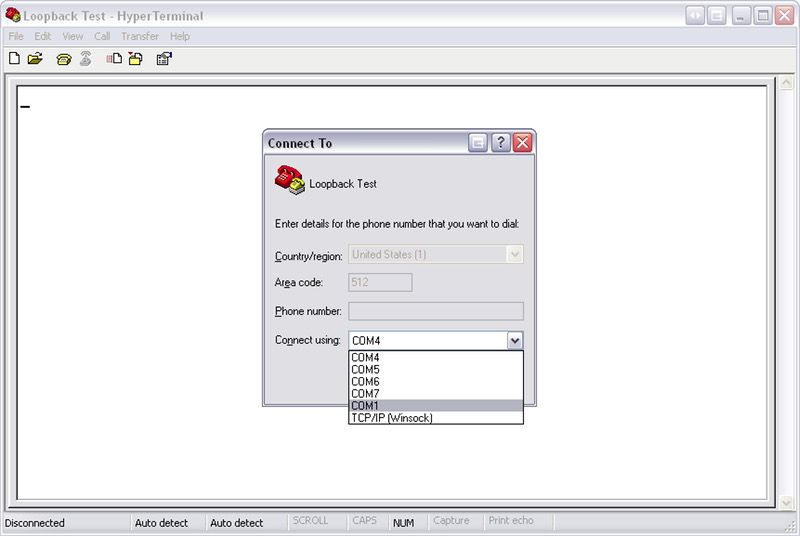
Identify the communications port you will use for the test.
 Specify communications port
3
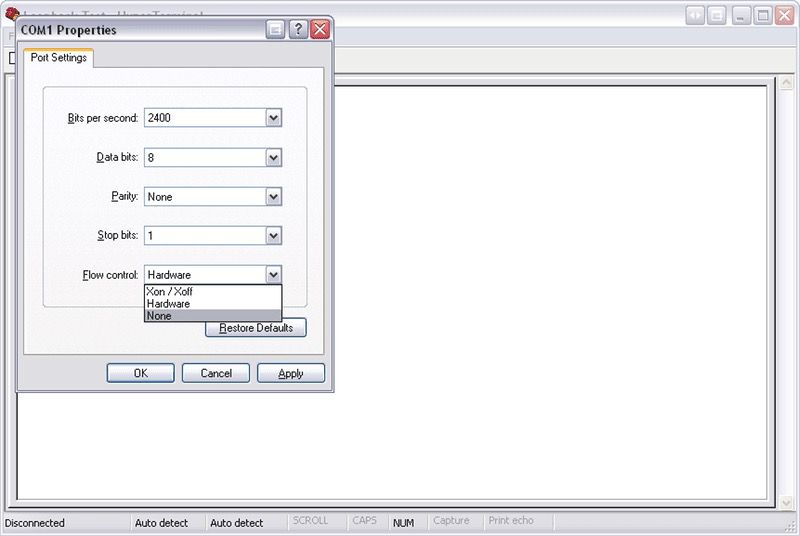
Select the type of flow control that will be used for the test. Our options are Xon/Xoff, hardware, and none. If you select the software flow control of Xon/Xoff, only the TXD and RXD pins need to be connected.
 Type of flow control
4
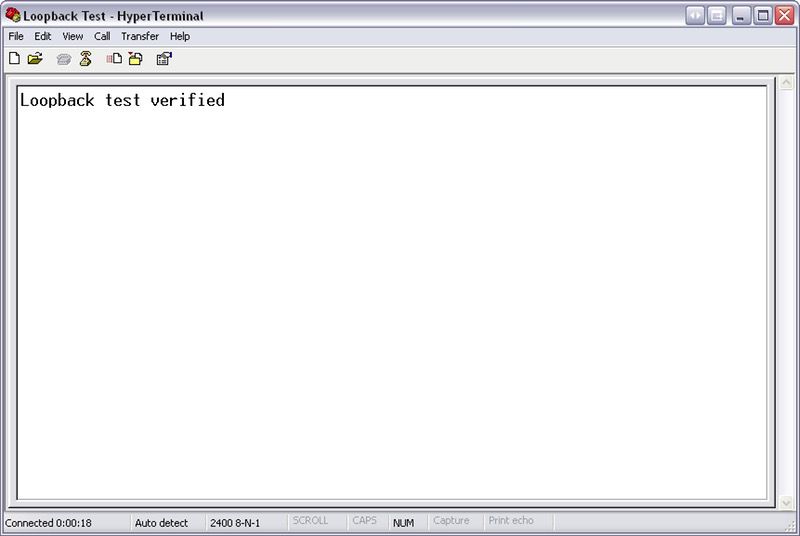
Type a message on your keyboard. Data received from the device will be displayed in HyperTerminal.
 Table of loopback test in HyperTerminal

While performing loopback tests with HyperTerminal is convenient, there are more efficient ways to test RS-232 ports.

There are limitations to this serial loopback test which inhibit your ability to debug issues that arise in hour serial communication. Windows 7 and 10 only support the paid and private version of HyperTerminal which may impact your decision to use it as your testing platform.

Conclusion

Many methods and strategies can be used in an effort to diagnose and resolve serial communication problems. We have looked at some of the most popular alternatives. We believe Electronic Team’s Serial Port Tester offers the best solution based on its versatility and powerful suite of features. It provides an alternative to HyperTerminal and can be used as Modbus testing software. It is a valuable tool for individuals involved in the development and testing of serial devices and applications.

small logo Serial Port Monitor
#1 at Communication Application
Serial Port Monitor
Log and analyze serial port activity
4.8 rank based on 345+ users
Get a download link for your desktop
Submit your email address to get a link for quick download on your desktop and get started!
or